
A while ago, I decided to invent my own rubber band bracelet. I fiddled around with the fork and rubber bands, trying to invent the new bracelet design. Sometimes, I ended up with a tangled knot of rubber bands. However, I actually was able to make a really fun design from my fiddling. I guess my curiosity paid off! I thought that the design was so cool and unique. I wanted to share it with as many people as I could who can make rubber band bracelets.
So, that’s why I want to teach you how to make Homeschooled Cookie’s amazing rubber band bracelet. Guys, I’m going to warn you. This bracelet is kinda tedious to make. However, Philippians 4:13 is true. Maybe watch something while you make it. Let’s start!
Step 1:

First, gather all the necessary materials. You’ll need a fork, a handful of rubber bands, and a rubber band bracelet clasp.
Step 2:

Make an infinity sign with the rubber band and slide each end of it onto the two outer picks of the fork. Repeat with another band. I’m just using random colors to show you how, but feel free to choose any colors you want. Rainbow might be a good start.
Step 3:

Do the same thing, except in the middle two picks of the fork.
Step 4:

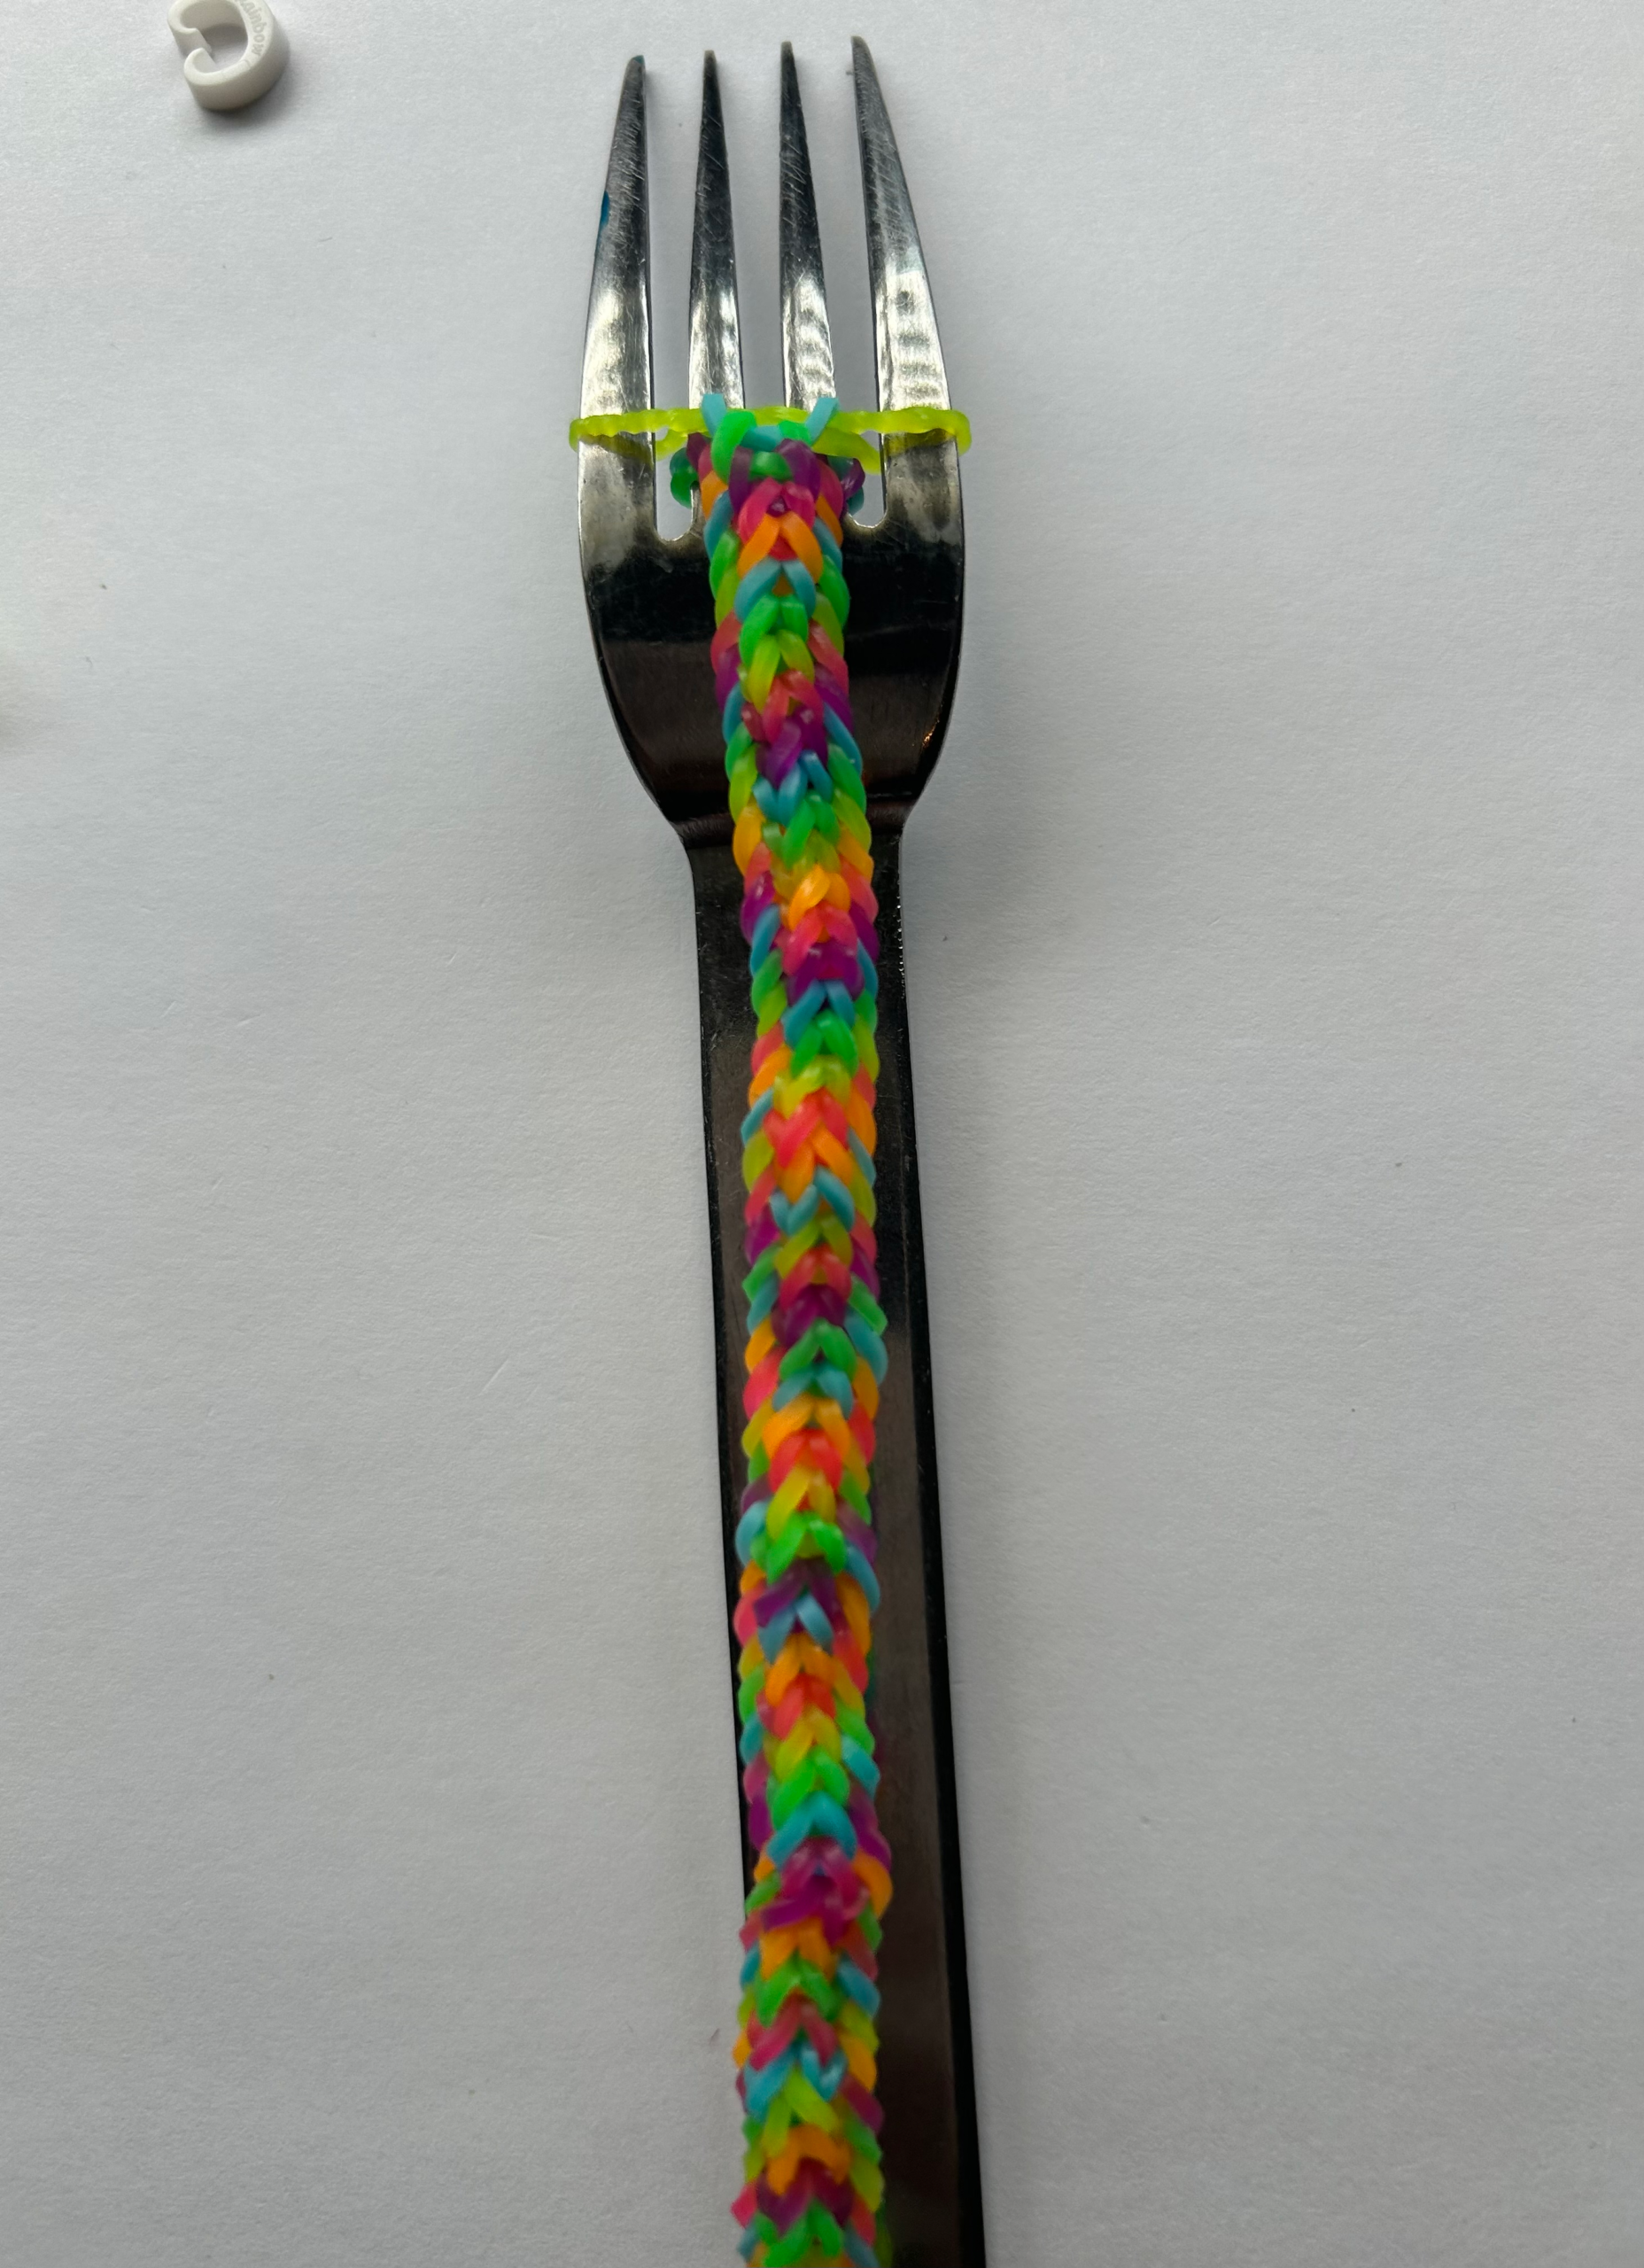
Next, slide both ends of the first band you put on the fork over the second band and on the middle two picks. Pull the bottom of the three bands on the middle two picks over. If you’re confused, look at the picture.
Step 5:

Make an infinity sign with another band and slide it on the outer picks of the fork. Slide the second band over the band you just put on, and on the middle two picks.
Step 6:

Then, pull the bottom of the three middle bands over the other two. Are you seeing the pattern? Hope so. It will look messy at first, but soon it’ll start to come together.
Step 7:

Now, it’s time for the tedious part. Just keep repeating the steps above. Watch a movie or something. That might help the time go by.
Step 8:

Once the bracelet is finally big enough, you need to finish it. Let me show you how.
Step 9:

Slide the last band over the middle two.
Step 10:

Loop the bottom band over the top. It should look like the picture above. Then, loop the other band over the final band.
Step 11:

Finally, attach the bracelet clasp to the last band. Attach both loops. Connect the start of the bracelet to the clasped end with the clasp. You’re finally done! You deserve my favorite cookie recipe! It’s really good.

Thank you for making Homeschooled Cookie’s amazing rubber band bracelet! Though it’s really tedious to make, the bracelet is so cute. It’s actually fun to make when watching something, like a movie. Your time and effort paid off! I hope you enjoy your bracelet! Bye, girlies!


Leave a Reply